Jingle All The Way!

Here at Bumbleblue, everything is in full festive swing. It’s the last day of November and I already feel like I’ve painted a truck load of Christmas decorations!

As well as painting orders for my fabulous customers, I’ve been trying to carry on with experimenting and keeping my creative juices flowing. It was actually a Christmas song that inspired my newest little creation – This is a good twist of fate as now I can argue that festive Michael Buble is educational!

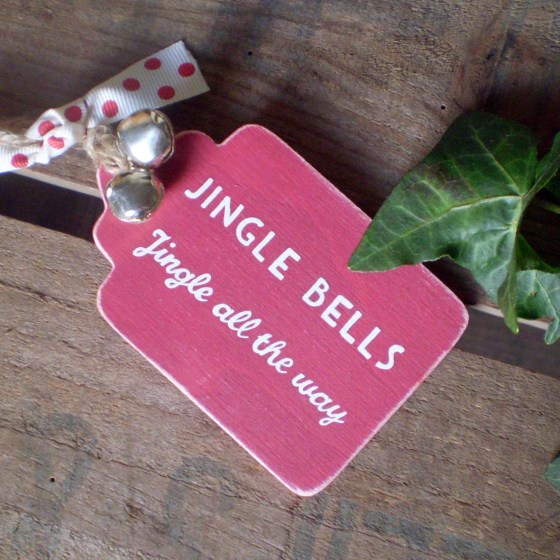
So, I had Jingle Bells in my head and fueled by a fresh cup of tea I opened my cupboard that holds a bit of everything and had a root around. At the bottom was a big bag full of my wrapping bits and bobs; rolls of pretty paper, bags of beautiful ribbons and tonnes of gorgeous tags.

Hmm, gift tags…

No present you wrap is complete without a tag. It identifies the sender, offers sentiment to the recipient and also makes the whole wrapping process complete. The more I thought about it, the more I started to feel sorry for the humble gift tag. We put so much thought into choosing which paper to buy, matching it up to ribbons and tags and when all’s said and done, we tear the package open and throw it all away.

A few more cups of tea and a few sketches and the ideas started flowing, I just needed one little thing to bring it all together…..

bells

jingle bells tag 2

jingle bells tag 1jingle bells tag 3jingle bells tag 4

Jolly Gingerbread Men

As well as being decorative and delicious treats, gingerbread men also make cheerful Christmas decorations. They have a cosy and rustic charm that is perfect for your home at Christmas.

The Bumbleblue gingerbread man has become a bit of a favourite of mine both to make and to hang up around the festive period. To be honest, there’s one that sits in my kitchen all through the year – just couldn’t wrap him up when we took the decs down last year!

They start their days as simple wooden shapes, but with a little love and care, and of course a splash of Farrow and Ball paint, they soon turn into little men. Each one is smartly dressed with the finest mother of pearl buttons and a little red bow.

These little chaps are all waiting for their own homes to go to to share Christmas with someone.

Cracking Christmas Cards

Now we’re officially into October, I feel a bit less premature talking about the festive season. After all it will soon be here, twinkling and jingling all around us – and you will be left wondering where November went!

I’m still on a bit of a mission to create a card range for Bumbleblue. I’ve moved onto brainstorming festive ideas, which I’ve absolutely loved! Being the fairy that I am, I love Christmas. As soon as I see those first decorations in the shops and hear those familiar tunes, my inner child takes over and I have a constant buzz of excitement right through until New Year.

Earlier in the year I found these fabulous tiny birds, perfect for cards. It wasn’t until I was painting some ‘Bobbin’ Robins’ that I thought about making some teeny tiny robins too.

As is usually the case, one idea spurs on another and before I knew it, the Bumbleblue desk was swamped with ideas, sketches, paint and material.


It’s taken a few weeks, but I’m really chuffed with some of my new additions and I hope you will pop over to my website and have a look!

www.bumbleblue.co.uk

Red, Red Robin

It’s that time of year again when the muggy heat of Summer is replaced with that creeping chill of Autumn.

I love the long Summer days (especially as it means I can live in flip flops for a few months!) but the change in seasons means it will soon be time for cosy nights huddled by the fire under big knitted blankets whilst drinking hot chocolate.

In a bid to be organised this year, I promised myself I would keep on top of my festive products. I know alot of you are going to flip at this point, but yes I’m talking about Christmas decorations. I adore the festive season and I love designing my own gifts and decorations. After a few years of developing ideas, there’s finally  a nice collection forming including one of my favourites, the little Bobbin’ Robin.

Each wooden bird is given a few coats of paint before being sanded down to give them a smooth finish.

His bright red tummy really turns him into a cheerful robin and this is left to dry before the tiny paint brushes come out! After another quick sand down, he’s given a wing, an eye and his song is painted onto his red tum.

A bit of string finishes him off and he’s ready to hang on your tree!

One Lump or Two?

I love scented candles and I think it’s safe to say I’ve got an unhealthy addiction to these and reed diffusers. They make my home smell amazing and different scents remind me of certain things or times spent with people.

A beautiful daffodil scented candle reminds me of a wine evening spent with my sister Zoe. It was summer and we’d just bought a new patio set so Zoe and I sat in the garden and enjoyed it (and a few glasses of wine). This was until Zoe smelt the rain – obviously a special talent on her behalf, and I insisted on folding all the furniture up and taking it inside just before a thunderous downpour. In my defense, it was new and I couldn’t leave it to get wet for the first time!

Another sandalwood and amber candle brings back memories of the first Christmas we celebrated in our house. Ed and I spent the whole Christmas together – something we hadn’t done in our 8 years as a couple! The candle was huge and an early present to myself (well why not) and it lasted throughout the whole festive season.

It would be nice to think that someone is reminded of something when they burn one of my candles.

So what scent to use in my new teacup candles? A recent present from Ed sorted this problem out, a gorgeous orchid with a delicate but sweet perfume. I moved Bumbleblue into the kitchen to start creating the candles…

I think the secret to making candles (and I’m by no means an expert) is ‘slowly does it’. Adding the wax slowly and in parts seems to create a more even candle in the end but this obviously requires a little patience! While the wax cooled, I got on with painting the wooden heart tags to add a touch of colour to the cups.

Tied together with string the teacups are finished off with a brown label and a little hand painted wooden heart tag. This turns them into a proper present and a great gift for someone who is as crazy about candles as I am!

Making a Bumbleblue Keyring

My hand painted keyrings always seem to go down very well whether it’s in one of my online shops, my website or at a craft event. When I’m preparing for a show, I usually pack as many as I can make because they just fly out!

They were one of the first ideas I had for a product when I started working with wood, and I still make them pretty much the same way. As the old saying goes ‘…if it ain’t broke, don’t fix it…’

Each keyring starts life as a disc of fine quality birch wood. My fabulous Dad then has the fiddly job of drilling a hole through each one and like a true professional he never moans, even when I turn up with 30+ little circles!


Each one is painted with a few coats of Farrow and Ball and is slightly sanded down giving it a lovely smooth surface with distressed edges. The letters are painted on by hand with a very small paint brush. As time consuming as this is I find it quite therapeutic, even though I tend to go a bit cross-eyed after the first 10 or so.

A little bit of string tied in a bow holds onto the keyring and adds the perfect shabby chic finishing touch. So there you go – it may only be a little thing, but I put alot of care into the making of every Bumbleblue keyring and I hope that anyone who buys one is happy with their new purchase.


Lino Printing For Fathers Day

I still can’t get the hang of designing and making products for specific occasions months in advance. We’re coming towards the end of May and I’m only just thinking about Fathers Day.  I have however made a note in my diary to start thinking about Christmas decorations in July – last year was just a bit too manic to repeat! I can’t wait to see Ed’s face when he starts spotting snowflakes mid-summer.

With Fathers Day round the corner, I’ve been scribbling down suitable images and designs for cards without going down the usual routes. I’ve been trying to keep my designs fairly original – to me there’s no point hand crafting a card that’s the spitting image of something you can buy in every other high street card shop.

I’ve also been experimenting with how I produce my cards and even had a go at some lino printing. The last time I tried this was in uni and I sliced into my hands that many times, I’ve been reluctant to try it again! When you’re looking to be original, a few risks are necessary now and then (any lino printers reading this will be laughing their socks off!)

Feeling brave, I attempted two simple designs to start with – better to work your confidence up with something small right?

I drew out the design and armed with my lino, iron (a very technical and necessary aid) and my cutting tools, I was ready.

The iron tip was from my house mate at the time. She’d had a good chuckle at me trying to hack away at the lino cold, and out of sympathy (and probably my sanity) she told me the lino is easier to cut if it’s heated slightly.

Just one amazingly important point I’ve got to stress, that might seem obvious. Keep your fingers out of the way! I know this and I know the tools I’m using are incredibly sharp. This all said, I still insist on holding the lino I’m working on, in the direction of all my cuts. One day, when I’ve got no fingers left, I might learn.

After I was happy with the stamps, I tried them out to see what they would look like and if they had actually worked.

Chuffed with how they had turned out, it was onto the cards and a few Fathers Day type messages…

I think I’m a little bit hooked to lino printing now and can’t wait to try other designs – I just hope my poor hands will forgive me!

Home Sweet Bumble Home

This is the journey of my Butterfly houses.

I always like to see how piles of materials can be turned into little creations. Every designer can put a little bit of themselves into each product, giving each one their own signature style.

As usual I visited my product development manager and my personal joiner (Mum and Dad!) and discussed a new idea. I left Dad with a rough design to see if it would be possible and cost-effective to make. Of course, Dad being Dad completely succeeded my expectations and on my next visit, a small town of Butterfly houses were waiting for me.

Made of quality wood and each one hand crafted by a joiner, Butterflies will be making a bee-line (or should that be a butterfly-line) to make one of these their home.

Once they land on the Bumbleblue desk, I can get my paint pots out and each house is given a few coats, sanded slightly in between to get a nice smooth and even finish. This also helps when I paint on any wording, which isn’t as easy on thick, lumpy paint.

The final coat is left to dry completely, and with my latest batch the sun made an appearance, perfect for helping the paint to dry.

When the whole house is finished, it’s then given a coat of external varnish to protect it from the elements, which have been a touch random lately!

Every house will reach its new owner with a little guide to help you to make the most of it and what to do to encourage butterflies to stay. I think one of these will definitely be making its way into our garden, they’re just too nice to sell them all!


Greetings from Bumbleblue

I love buying cards – Birthday, good luck, new home or just because.

It’s amazing how picky you can become when most cards are only really appreciated for a short time and then added to the recycling pile of papers. I’m probably a bit sentimental, but I’ve got cards that I’ve saved – some because of the occasion they were sent and some because of the sender.

Most of my 18th and 21st birthday cards are kept safely all together along with some new home cards from when Ed and I moved in together. Handwritten messages from friends and family are little links to the past and looking back through them always makes me smile.

This all said I’m an absolute nightmare when shopping for cards to give to people. It has to be one that I like and would be happy to receive. Then it needs to be what I think the person I’m sending it would like to receive, obviously! Finally, due to the similar strict process of present buying (don’t get me started) it needs to be a reasonable price. This all sounds pretty simple, but any occasion I need to buy a card it’s usually quite an ordeal and tea and some sort of chocolate therapy is required.

For quite a few birthdays I’ve ended up making my own cards after trawling from shop to shop without so much as a sniff of a ‘nice’ card. Creating a little collection of my own was a good excuse to wander round boutique card shops for inspiration. Alot of my ideas came from things I’d made in the past and a few of the gorgeous shops we had visited in York.

A new letter stamp set has already been worth its weight in gold;


Compared to my usual wooden products, cards are quite different, but I wanted all the cards to look and feel like the rest of my work. With the help of some extra tiny wooden shapes, they were given the Bumbleblue touch.


All packaged up, my first little lot are ready for my craft event next week – fingers crossed they will go down well!


Vintage, Shabby and indeed chic

Working with wood, it’s incredibly handy having a joiner Dad. He’s on hand for advice and he’s constantly drilling holes for me!

I remember when I was little, being sat at the end of our garden watching Dad working in his workshop. To make me feel like I was helping, I would have a block of wood from his offcuts box and a pile of nails to hammer into it. I started young!

My parents have got used to me popping over for a cup of tea, complete with a box full of new wooden bits that all need holes of various sizes drilling into them. Many a good idea has also come from these tea visits and my latest product is no exception. Vintage wooden signs.

I love old signs, packaging and typography and my house is literally bursting – from blown up old wine labels in the kitchen to place name signs in the bathroom.

Dad could source me lengths of wood with a rough unfinished surface, perfect for creating that ‘its been around forever’ look. The first sign I painted cheekily landed back into Dad’s hands as a Christmas present! Finally I’ve got round to painting more.

Hopefully the finished product reflects all the work and care that has gone into it. Now all it needs is a loving home!